Now that Autumm is here, I can't get enough of quilting! My awesome husband bought me a NEW sewing machine for my birthday, and WOW!!!!
I purchased my old sewing machine when I was 16 years old. It was called the PHAFF HOBBY 303. It did two stitches - straight and zigzag and went forward and backward. It worked for what I needed it for. Recently, as I've been doing more quilting, I started having a LOT of TROUBLE with my old sewing machine. It seemed to have tension issues, jamming issues, and one of the biggest issues - every time I needed to wind the bobbin thread, I couldn't get the wheel to loosen up. The last time I wound bobbin thread on that thing it required dear husband to get all sorts of tools out to loosen it up.
So anyway - new machine!! It's a Brother, and it doesn't have 2 stitches - it has 225 stitches!!!! It does embroidery, too! Also - did you know with new machines you don't have to use a pedal if you don't want too?! What the heck. Anyway, I hope it won't be too complicated! hehe. Alright, so all that is to say, I'm using my sewing machine a lot.
Also, side note - is it just me, or does it seem like just about everyone is pregnant these days? And when you have a lot of friends that are pregnant, that means a lot of baby presents...now I have no problem spending money on baby presents, I LOVE buying baby presents! But I also love doing craftsy stuff! When a couple of our friends announced their pregnancies, I thought I would start making baby quilts. And then another friend got pregnant, and then another, and then another, and then another, and - I'm sure you get the picture. As much as I would LOVE to make baby quilts for everyone - I don't have enough time or money or energy to do it for everyone.
When Dave and I started making our registry for our baby, I went onto Etsy.com and fell in love with some burb cloths I found on there. The fabric was so beautiful! And then, I had this thought - I wonder if I could MAKE burp cloths for some of my friends who are pregnant. So I googled "how to make burp cloths" and sure enough I found a tutorial on how to make burp cloths. And I realized that they would be EASY to make, and that it would just take a couple hours to make a set of burp cloths!
The hardest part of making these burp cloths was coming up with the pattern. The tutorial I used (which will be listed below) gave dimensions for the pattern, and even showed a picture of it. Only problem - they didn't have a "print this template" option. So I had to DRAW the pattern myself - not something that I can do very well.
After I got the pattern figured it out, it was smooth sailing.
Here are a couple pictures of the ones I've made so far. I've ordered some more fabric, and I can't wait to make more of these for gifts. This is a GREAT project to do if you're interested in quilting but aren't good at finishing projects! haha. If I can do it in a couple hours, so can you!
The website with the tutorial is here if you want to do this project at home:
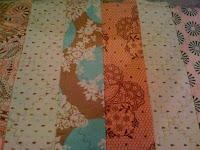
Here is a picture of the fabric with the pattern pinned to it. I cut bigger than the pattern on the fabrics, so I'd be able to make frayed edges. I cut the batting a little smaller than the pattern so I wouldn't have waste.
A friend of mine just had the cutest little girl! Her name is Rouen, so I made these burp cloths, and with my fun new sewing machine I was even able to embroider her name on the burp cloths! So cute!

A friend church had a little girl and I made these ones for her! I like to do 4 to a sets.

Happy Quilting!


 That's all for tonight. Can't wait to work on it some more! (At least all tonight on the quilt...see below for the diaper bag!)